Interior design has always lived or died on the client's ability to imagine the finished space. Mood boards help—but they're abstract. 3D models help more—but they take days to build. AI rendering changes the equation entirely: upload a photo of an empty room, describe what you want, and receive a photorealistic image of the finished design in under a minute.
This guide walks through the end-to-end workflow interior designers are using with Rendershop: from sourcing the right input photos, to writing prompts that communicate style accurately, to iterating and presenting finished renders to clients.
Why Interior Designers Are Switching to AI Rendering
Traditional visualization options for interior designers each come with significant friction:
- Physical mood boards: Good for texture and color, poor at communicating spatial relationships and scale.
- 2D floor plans: Necessary for contractors, but impossible for most clients to read intuitively.
- 3D software (SketchUp, Revit, 3ds Max): Powerful but requires significant technical skill and hours of modeling time per room.
- Hiring a 3D artist: Expensive ($200–$800 per image) and slow (3–7 day turnaround).
AI rendering sidesteps all of these bottlenecks. A designer with a good photo of the existing space and a clear vision can produce presentation-quality renders in the same client meeting where the brief is discussed. That speed changes the sales conversation entirely.
Step 1: Capture or Source the Right Input Photo
AI rendering quality starts with input quality. For interior design projects, you're typically working with one of three source images:
Option A: Photo of the Existing Space
This is the most common scenario—a client has an empty room or a space with existing furniture they want to redesign. Take a wide-angle photo from a corner to capture as much of the room as possible.
Photo checklist for best results:
- Shoot from a corner to show two walls and the floor plane clearly.
- Use natural light when possible—flat overhead lighting flattens AI results.
- Keep the lens level—avoid tilted perspectives that confuse the AI's understanding of walls vs. floor.
- Minimum 1080p resolution—higher input resolution yields sharper render output.
- Remove clutter if possible—a cleaner room lets the AI interpret the space's architecture more accurately.
Option B: Floor Plan or Sketch
If the space doesn't exist yet (new construction, renovation), you can use a sketch-to-render workflow with a hand-drawn or CAD floor plan elevation. The AI interprets spatial geometry from the drawing and applies your style description.
Option C: Reference Photo from Another Project
Some designers start with a reference image of a space that has the right proportions and use it as a structural foundation—then describe the materials and furnishings they actually want in the prompt. This is particularly useful for spec homes or model units where no physical space exists yet.
Step 2: Write Prompts That Communicate Style Accurately
The prompt is where most interior designers either win or lose. A vague prompt ("modern living room") produces generic results. A specific prompt produces something you can actually present to a client.
The Interior Design Prompt Formula
Structure your prompt across four dimensions:
1. Room type & style
e.g., "open-plan kitchen and dining area in a Japandi style"
2. Key materials & finishes
e.g., "white oak flooring, matte black fixtures, honed marble countertops, linen upholstery"
3. Furniture & layout
e.g., "large sectional sofa centered on a jute rug, low-profile coffee table, built-in shelving on the back wall"
4. Lighting & atmosphere
e.g., "warm ambient lighting with pendant lights over the island, afternoon light entering from the left window"
Example Prompts by Style
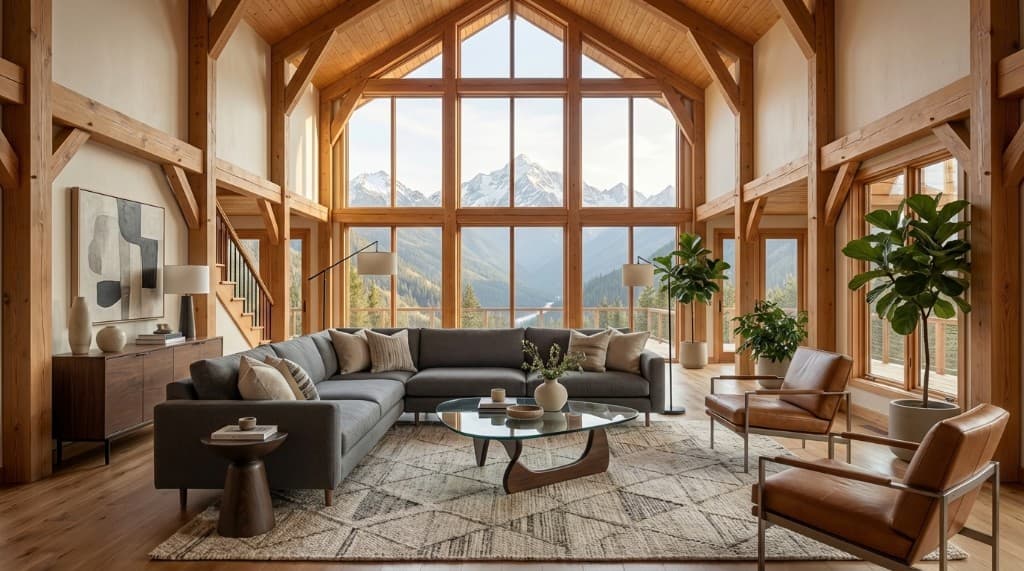
Scandinavian / Japandi
"Japandi living room with white oak hardwood floors, low-slung walnut sofa with off-white boucle cushions, minimal built-in bookshelf in warm white, ceramic table lamp, single statement fiddle-leaf fig, soft natural light from large windows"
Transitional Luxury
"Transitional master bedroom with cream linen wall paneling, tufted king bed in dusty blue velvet, matching nightstands in brushed gold, herringbone oak floor, sheer white drapes, warm evening lighting"
Industrial Loft
"Industrial loft dining room with exposed brick accent wall, poured concrete floor, black steel and reclaimed wood dining table, mismatched vintage chairs, Edison bulb pendant lights, overcast daylight from factory windows"
Modern Farmhouse
"Modern farmhouse kitchen with shaker-style white cabinets, butcher block island, unlacquered brass faucet and hardware, subway tile backsplash, open shelving with ceramics, wide plank white oak floor, bright midday light"
Step 3: Generate, Compare, and Iterate
Generate 3–4 variations of each room with slightly different prompts or creativity settings. This gives you options to present to the client and often surfaces unexpected combinations you wouldn't have thought to describe. Interior design clients respond well to choice—two or three strong options typically drives faster decisions than a single recommendation.
Using the Edit Tool for Room-by-Room Refinement
Once you have a base render the client likes, use Rendershop's Edit tool to make targeted changes without regenerating the whole room. Click the area you want to change, describe the modification, and the AI updates only that zone.
Common interior edit requests:
- • "Change the floor from hardwood to large-format porcelain tile"
- • "Replace the sofa with a deep green velvet sectional"
- • "Add recessed lighting in the ceiling"
- • "Change the cabinet color from white to sage green"
- • "Swap the countertop to Calacatta marble"
- • "Add a large abstract painting on the back wall"
- • "Change the window treatment to roller shades in off-white linen"
The ability to swap individual elements—especially materials and finishes—is one of the highest-value use cases for interior designers. Clients can see three different countertop options on the same kitchen render in real time during a presentation. That replaces back-and-forth email threads with on-the-spot decisions.
Before & After: Empty Room to Furnished Interior
The before/after format is especially compelling for interior designers pitching redesigns of existing spaces. Clients can see their actual room—walls, windows, proportions they recognize—transformed by your design vision.
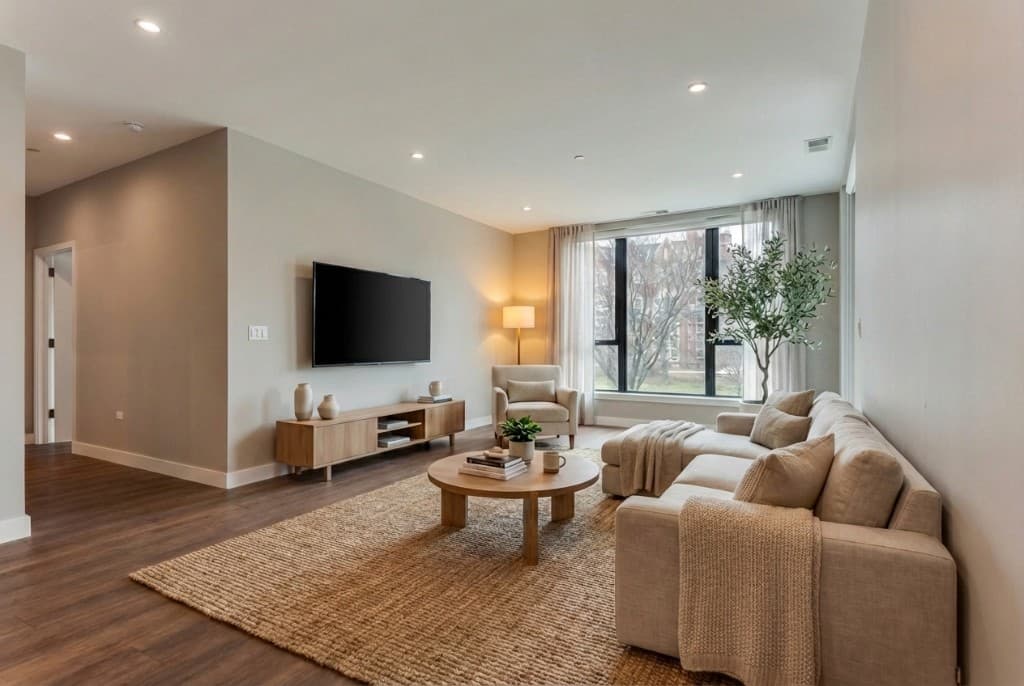

AI renders transform empty spaces into fully furnished, photorealistic interiors
How AI Rendering Fits the Interior Design Sales Process
Understanding where AI rendering creates the most value in your business process helps you deploy it strategically, not just as a novelty.
| Stage | Traditional Approach | With AI Rendering | Time Saved |
|---|---|---|---|
| Initial pitch | Pinterest boards, magazine cutouts | Renders of the client's actual room | Win rate ↑ |
| Concept presentation | 2D mood board, 3–5 days prep | Photorealistic renders, 30 min prep | 4+ days |
| Material selection | Physical samples, imagination | Live swap edits during meeting | 1–2 weeks |
| Design revisions | Back to CAD, rerender, 3–7 days | Edit tool, 5–10 minutes | Days per round |
| Client sign-off | Often requires multiple rounds | Higher confidence, faster decisions | 1–2 revision rounds |
Charging for Renders: How Interior Designers Are Pricing This
Interior designers using AI rendering are monetizing it in a few different ways:
Bundled into Design Packages
Many designers include renders as a deliverable in their standard packages without separate line-iteming. This increases the perceived value of their package—and their close rate—without raising the headline price.
Standalone Concept Renders
Some designers offer a pre-engagement "concept render package" at $150–$400 to help clients visualize a space before committing to full design services. This lowers the barrier to entry while introducing the designer's aesthetic.
Revision Rounds as a Scope Control Tool
Because renders are so fast to produce, designers can offer 2–3 rounds of render revisions within scope and charge for additional rounds. The fast turnaround also reduces the friction clients feel about providing feedback quickly.
See our pricing page to understand Rendershop's credit model and how many renders you can produce per project.
Frequently Asked Questions
Do I need a 3D model or CAD file to use AI rendering?
No. Rendershop works from photos, sketches, or floor plan images. You don't need any 3D modeling software or technical CAD skills. A good phone photo of the room is sufficient input for most projects.
How accurately does the AI preserve the room's actual proportions?
The AI interprets the spatial geometry of the input photo and maintains the room's key proportions—ceiling height, window placement, and floor area. For highly detailed architectural accuracy (e.g., exact millimeter dimensions), a CAD-based workflow is better. For client presentations and concept approvals, AI renders are accurate enough.
Can I render specific furniture pieces from a brand catalog?
You can describe furniture in detail (dimensions, style, material, color) and the AI will produce a close approximation. For exact product representation, describe the piece precisely in your prompt—e.g., "a Restoration Hardware Maxwell sofa in performance grey linen." The result will reflect the style closely even if not pixel-perfect to the product.
Is AI rendering good enough to replace traditional visualization entirely?
For concept presentations, client approvals, and marketing imagery—yes. For technical construction documents or highly detailed specifications that must be contractually accurate, traditional CAD remains the standard. Most designers use AI for early-stage visualization and client communication, then hand off to technical drawings for execution.
How many renders does a typical interior design project need?
A single-room residential project typically uses 6–12 renders across the design process: 3–4 initial concepts, 2–3 material variation rounds, and 1–2 final presentation renders. Rendershop's credit model makes this affordable even on smaller residential projects.
Start Rendering Interiors Today
The interior designers winning new clients in 2026 are the ones who can show—not just describe—what a finished space will look like. AI rendering makes that capability accessible without a team of 3D artists, expensive software licenses, or days of modeling time.
Upload your first room photo, describe your design vision, and generate a photorealistic render in under a minute. Your next client presentation just got significantly more compelling.
Ready to Render Your Interior Designs?
Create a free account and get 50 credits to start generating photorealistic interior renders today. No credit card required.
— The Rendershop Team