AI rendering tools have gotten remarkably good at interpreting spatial relationships, surfaces, and light. But they are not magicians. When you feed them a blurry, overexposed, or badly composed photo, the AI fills in gaps with guesswork — and the result shows it. When you feed them a clean, well-lit, geometrically correct source image, the output is almost always client-ready on the first pass.
This guide covers the specific camera settings, lighting conditions, angles, and composition principles that produce the strongest AI rendering results — whether you're shooting an empty room for virtual staging, capturing an exterior for a photorealistic render, or photographing a client space for an interior redesign. Most of this applies whether you're using a DSLR, a mirrorless camera, or a recent smartphone.
Why Your Source Photo Is the Most Important Variable
AI rendering models work by analyzing the spatial and surface information embedded in your input image. They infer wall angles, floor planes, ceiling height, material textures, and lighting direction from the pixels in your photo. When that information is missing or corrupted — by blur, harsh shadows, extreme overexposure, or distorted perspective — the model either guesses wrong or defaults to averages that don't match your actual space.
The most common complaint among new AI rendering users is "the result doesn't match my room." In the vast majority of cases, the fix isn't a different prompt or a different AI tool — it's a better source photo. Solving the photo quality problem once, at the capture stage, eliminates the most frustrating class of rendering issues entirely.
Camera Settings: The Optimal Starting Point
Aperture: f/8 to f/11 for Interiors
For interior architectural shots, use a mid-range aperture — f/8 to f/11 is the sweet spot. This gives you enough depth of field that every element in the frame is sharp, from the foreground floor to the back wall. Avoid wide-open apertures (f/1.8–f/2.8) that produce shallow depth of field: a blurry background corner gives the AI less surface information to work with, and the results in that region will be softer and less accurate.
For exteriors, f/8 to f/13 works well. You're rarely close enough to foreground objects for depth of field to become a problem, but sharpness across the full facade is important for the AI to correctly interpret material texture and window proportions.
ISO: Keep It Low — 100 to 400
High ISO introduces grain (digital noise) that the AI rendering model interprets as texture variation. A grainy wall looks like it has subtle texture to the AI; a grainy floor looks like it has speckling. The model renders what it sees, not what you intended.
Shoot at ISO 100–400 whenever possible. If you need a higher ISO to get the shot in low light, prioritize ISO over a slower shutter speed — motion blur from a long exposure is worse for AI parsing than a bit of grain. But the best solution is better lighting (see below) rather than a higher ISO.
Shutter Speed: Prioritize Sharpness
For static scenes (empty rooms, building exteriors, staged spaces), use a tripod and set your shutter speed to whatever is needed for proper exposure at your target ISO and aperture. On a stable tripod, 1/15s or even 1/4s is fine and will produce sharper results than trying to handhold at 1/60s with a high ISO.
Without a tripod, keep shutter speed above 1/(focal length × crop factor) to avoid motion blur. On a full-frame camera with a 24mm lens, that means at least 1/25s; on a smartphone, keep it above 1/30s.
White Balance: Set It Manually
Auto white balance can shift between shots and create color casts that confuse the AI's material recognition. A cool-tinted wall reads differently from a warm-tinted one. Set white balance manually — Daylight (5600K) for exterior shots or spaces with natural light, Tungsten (3200K) or a custom setting for spaces with warm artificial lighting. This consistency gives the AI a cleaner signal about actual material colors.
File Format: RAW or Highest-Quality JPEG
Shoot RAW if your camera supports it and you have time to process. RAW files contain more tonal information, which means you can recover overexposed highlights and underexposed shadow areas in post-processing — critical for interior spaces where a bright window and a dark corner coexist in the same frame. Upload the processed JPEG (or a TIFF) to the rendering tool.
If you're shooting JPEG, use the highest quality setting your camera offers and avoid re-saving JPEGs repeatedly — each save introduces additional compression artifacts.
Source Image Quality: What Works vs. What Doesn't
| Image Characteristic | Good for AI Rendering | Problematic for AI Rendering |
|---|---|---|
| Sharpness | Tack sharp across full frame; every surface readable | Motion blur, out-of-focus background walls |
| Exposure | Even exposure; no blown highlights or crushed shadows | Blown-out windows; dark shadow zones with no detail |
| Noise / Grain | Clean, low-ISO image | High ISO grain misread as surface texture |
| Perspective | Near-level horizon; vertical lines straight or corrected in post | Keystone distortion; extreme wide-angle barrel distortion |
| Field of view | 24–35mm equivalent; room feels natural-scale | Ultra-wide (sub-20mm) distortion; fisheye |
| Composition | Three walls or two walls + floor visible; clear spatial context | Single wall; ceiling-only or floor-only shots |
| Clutter | Room cleared of personal items; surfaces clean | Dense clutter that obscures floor, wall, and corner geometry |
| Resolution | 1500px wide or larger (2000–4000px ideal) | Low-resolution crops, heavily compressed thumbnails |
Lighting: The Make-or-Break Factor
Natural Light: Best for Interiors
For interior spaces, diffused natural light is the ideal source image condition. An overcast day acts as a giant softbox — light comes from the whole sky rather than a single bright direction, reducing harsh shadows and giving even illumination across all surfaces. On bright sunny days, close blinds or sheer curtains partially to reduce the contrast between windows and interior walls.
Shoot during the middle part of the day (10am–3pm) when sun angle is higher and less likely to create low-angle shafts of direct light across the floor or walls. Early morning and late afternoon golden-hour light is beautiful in finished photography but creates extreme directional shadows that can confuse AI spatial parsing.
Artificial Light: Use It to Fill, Not Lead
Interior artificial lighting — ceiling fixtures, lamps, sconces — creates warm pools of light and dark corners that look great in atmospheric photography but provide poor even coverage for AI source images. If you're shooting a space that relies on artificial light, turn on every light source in the room to minimize dark zones. Add supplemental flashes or LED panels to fill shadow areas, particularly in corners where the AI needs to read the floor-wall-ceiling intersection.
Avoid mixed lighting — warm incandescent in one part of the room and cool daylight from a window in another. The AI struggles to distinguish intentional color temperature from actual surface color when the lighting environment is inconsistent.
Exteriors: Overcast or Even Shade Works Best
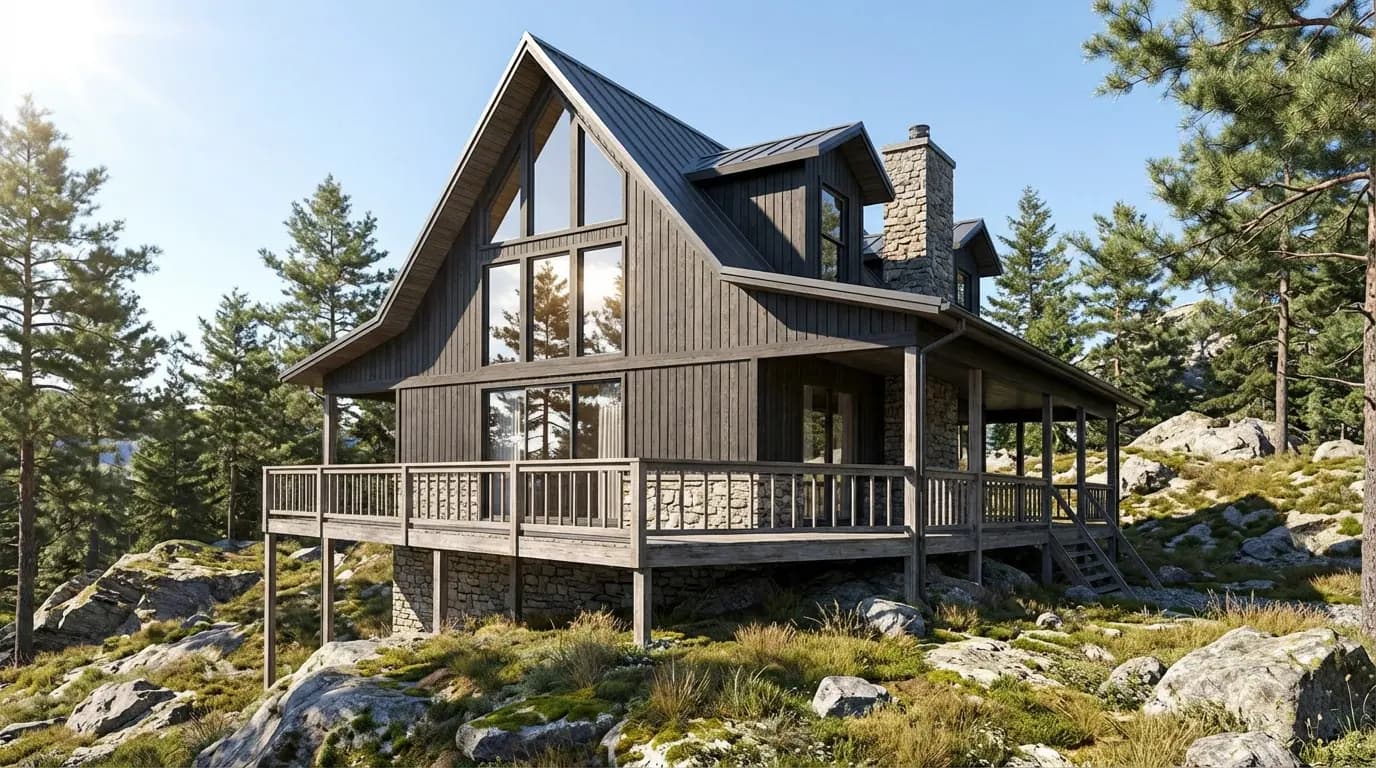
For exterior building photos, overcast conditions again win for AI source images. Even light across the facade means every material — brick, stucco, glass, metal panel — reads clearly and consistently. Direct midday sun creates harsh shadows on recessed windows, entryways, and under eaves that can obscure the actual material and geometry you want the AI to reproduce accurately.
If you must shoot in direct sun, position the building so the sun is behind you (front-lit facade) rather than side-lit. Front lighting minimizes shadow complexity while preserving surface detail.
Even lighting, clear spatial geometry, and clean surfaces — everything the AI needs to produce an accurate render
Composition and Angle: How to Frame the Shot
Interior Rooms: The Corner-to-Corner Shot
The most useful interior shot for AI rendering shows at least two walls and the floor — ideally three walls (the two side walls and the back wall), with the floor visible in the foreground. This gives the AI clear information about the room's dimensions, the wall-floor-ceiling intersections, and the spatial relationships between surfaces.
Position your camera in the corner opposite the main focal wall (or in a doorway looking in) at roughly eye level — approximately 4.5 to 5.5 feet off the ground. This height approximates human eye level and produces the most natural-looking renders. Shooting too low creates dramatic low-angle perspectives that work poorly for staging renders; shooting too high makes the room look like it's being viewed from a loft or a child's perspective.
Lens Choice: 24–35mm Equivalent
A focal length in the 24–35mm full-frame equivalent range captures a realistic field of view that matches how a person actually perceives a room. This range is wide enough to show the space without extreme distortion, and narrow enough to avoid the fisheye-like barrel distortion that ultra-wide lenses produce.
Most modern smartphones shoot in the 24–28mm equivalent range by default — which is ideal. Avoid the ultra-wide camera lens on smartphones (typically 13mm equivalent or wider); its distortion makes vertical lines bow outward and creates perspective problems the AI has difficulty correcting.
Level the Camera — Verticals Must Be Vertical
One of the most common source photo problems is a tilted camera — either side-to-side or front-to-back. When the camera is tilted forward or back (keystoning), vertical lines converge toward the top or bottom of the frame. The AI rendering model parses converging verticals as actual slanted walls. The render reflects this: furniture appears on a sloped floor, or walls look like they're leaning.
Use your camera's built-in level (virtually all cameras and smartphones have one) to keep the sensor perfectly horizontal. Correct any residual keystone distortion in post-processing using lens correction tools in Lightroom, Camera Raw, or your camera's companion app before uploading.
Exterior Buildings: Distance and Elevation
For exterior shots, step far enough back from the building that you can capture the entire facade without pointing the camera upward significantly. Camera tilt for exteriors causes the same keystoning problem as interiors — vertical walls appear to converge toward the top of the frame, and the AI renders the building with a trapezoidal footprint.
Shoot from across the street or from a distance that lets you frame the facade straight-on with the camera level. If your space doesn't permit that distance, use a tilt-shift lens or apply perspective correction in post. For multi-story buildings, shooting from a slightly elevated position (a small stepladder, or from an adjacent building's ground floor window) can help you avoid having to tilt up.
Preparing the Space Before You Shoot
Pre-shoot checklist
- Remove all clutter, personal items, and furniture (for virtual staging shots)
- Clean the floors — debris and scuff marks show up clearly at render resolution
- Turn on all ceiling and wall lights; remove or tuck away visible cords
- Open all interior doors so the AI sees full room depth, not a wall of door
- Partially close blinds or curtains to manage window brightness vs. interior exposure
- For exteriors: remove parked cars, trash bins, and temporary items from the frame
- Don't leave ladders, construction materials, or tools visible in the frame
- Don't shoot directly into a bright window without HDR or exposure blending
The "clean empty room" principle is especially important for virtual staging renders: every item you leave in the room is either something the AI has to stage around or something that will appear floating awkwardly in the final render. Spending 10 minutes clearing the space saves significant time in post-render correction.
Post-Processing Before Upload: The Final Optimization Pass
A small amount of photo editing before uploading can significantly improve render quality. You don't need professional retouching skills — just a few targeted adjustments.
Exposure Balancing
The goal is an image where both the bright areas (near windows) and the dark areas (room corners) have visible detail. In Lightroom or Camera Raw, bring down highlights and raise shadows until the full tonal range is readable. If you shot RAW, you have much more latitude here — a properly shot RAW file can typically recover 3–4 stops of highlight detail and 2–3 stops of shadow detail.
If you can't balance exposure in a single shot (very common in brightly lit rooms), shoot HDR: take three exposures at -2, 0, and +2 stops and merge them in your editing software. The merged result gives the AI full detail across the entire tonal range.
Lens Distortion and Perspective Correction
Apply lens correction in your editing software to remove barrel distortion and chromatic aberration. Then use the perspective correction tools (Transform in Lightroom, Perspective Warp in Photoshop) to straighten any remaining converging verticals. When verticals are straight and horizontals are level, the AI's spatial inference is much more accurate.
Resolution and Export Settings
Export at 2000–4000px on the long edge, JPEG quality 85–100%, sRGB color space. Rendershop accepts images up to its platform limit; larger isn't always better if it pushes you over file size limits, but under 1500px starts to impact render detail. Avoid heavy JPEG compression at export — aim for a file size of at least 500KB for a room interior.
Shooting with a Smartphone: Tips for the Best Results
You don't need a DSLR or mirrorless camera to get excellent AI rendering results. Modern flagship smartphones — iPhone 15 Pro / 16 Pro, Google Pixel 9, Samsung Galaxy S25 — capture images that are entirely suitable for AI rendering when used correctly.
- Use the main camera (1x), not the ultra-wide. The 1x lens on most modern flagships is a 24–28mm equivalent with minimal distortion. The ultra-wide creates barrel distortion that degrades AI parsing accuracy.
- Lock exposure and focus. On iPhone, tap and hold on the subject until you see "AE/AF Lock." On Android, tap to focus, then use the lock feature in your camera app. This prevents the camera from auto-adjusting between shots.
- Turn off Smart HDR / Computational Photography. These features can add dramatic sky replacements, artificially sharp edge contrast, or surreal local tone mapping that confuses AI rendering models. Shoot in standard photo mode, or use a third-party camera app (Halide, ProCamera) that gives you more control.
- Use a portable mini tripod or place the phone on a level surface. Even the best optical image stabilization doesn't substitute for a stable platform when shooting at lower shutter speeds in dim interiors.
- Shoot in the highest available resolution. Most modern smartphones have a "maximum resolution" or "48MP/50MP" mode in settings — enable it for source images you plan to render.
Frequently Asked Questions
Does image resolution really affect AI render quality?
Yes, meaningfully. Low-resolution source images lack the texture and edge detail the AI needs to correctly identify materials and spatial boundaries. Renders from very small images (under 800px wide) often show artifacts at wall-floor intersections and material transitions. Aim for at least 1500px wide; 2000–3000px is ideal for most rendering use cases.
Can I use a photo with furniture in it for virtual staging?
You can, but the results are inconsistent. When furniture is present, the AI has to decide whether to stage around it or replace it, and the outcomes are harder to predict. For the cleanest virtual staging results, always start with an empty room. Remove all furniture, rugs, and personal items before shooting.
My room has very little natural light. How should I approach this?
Turn on every artificial light source in the room to fill it as evenly as possible. Add supplemental lighting — a large LED panel or portable ring light — pointed at the darkest corners and ceiling to lift shadow areas. Shoot on a tripod at ISO 200–400 with a longer shutter speed (1/4s to 1s) rather than cranking ISO. If the window is still blowing out vs. the interior, shoot a two-exposure HDR and merge before uploading.
Does it matter what angle I shoot an exterior from for AI rendering?
Yes — a straight-on, slightly elevated, level shot of the main facade produces the most accurate exterior renders. Three-quarter angles (showing two facades) work well too but require the AI to render two different material treatments simultaneously. Avoid extremely oblique angles that show mostly one end of the building; the AI has less facade surface to work from, and results are less detailed.
Does the time of day matter for exterior source photos?
It depends what you're rendering. If you want a daytime render, shoot the exterior in even overcast light or front-lit midday sun. If you want to produce an AI twilight render, you can actually use a standard daytime exterior shot as the source — the AI handles the lighting transformation during the render. The source photo just needs to show the building geometry and materials clearly, regardless of the target render time of day.
Better Photos, Better Renders — Every Time
The time investment in capturing a proper source image is minimal — maybe 20 extra minutes for careful setup, leveling, and a few test exposures. The return on that investment is significant: fewer failed renders, less time spent re-shooting and re-uploading, and consistently client-ready output that you can deliver with confidence rather than crossing your fingers on every job.
To summarize: shoot at f/8–f/11, ISO 100–400, on a tripod, in diffused natural light, with the camera level, from a 24–35mm equivalent focal length, with the room cleared and clean. Correct lens distortion and perspective in post before uploading. These six habits, applied consistently, will put the quality ceiling of your AI renders several levels above what most users achieve — and the AI does the rest.
Ready to see what a well-shot source photo produces? Check out Rendershop's full feature set and see our pricing to get started. Upload a clean, well-lit photo and the difference is immediate.
Your Best Photo Deserves the Best Render
Upload a well-lit, level source image to Rendershop and get a photorealistic architectural render in minutes — virtual staging, exterior redesign, sketch-to-render, and more.
— The Rendershop Team