Turning a flat elevation drawing into a photorealistic exterior render used to require a skilled 3D artist and days of modeling time. AI rendering has changed the math completely — you can go from a CAD elevation or hand sketch to a client-ready exterior image in minutes, without 3D modeling, without a rendering subscription that costs thousands per seat, and without waiting on a third-party studio.
But exterior rendering from elevations has specific challenges that interior or photo-based renders don't share. Buildings need environmental context (sky, landscape, surroundings), believable scale, and precise material legibility. Without knowing the right approach, you'll produce renders that look technically competent but don't feel real — the building floats in a white void, the windows are dark holes, the materials read as generic gray instead of the board-formed concrete or cedar cladding you specified. This guide covers the full workflow.
Why AI Exterior Rendering from Elevations Works
Most AI rendering tools were originally designed around photo-to-render workflows: you upload a photograph and the AI re-styles it. But modern AI rendering — including Rendershop's render and sketch-to-render modes — handles elevation drawings well because the AI has learned to interpret architectural linework: wall planes, window openings, roof lines, and structural elements.
The key insight is that an elevation gives the AI exactly what it needs — a precise statement of the building's geometry. The AI doesn't need photographic color and texture to understand the structure; it reads the linework and fills in the photorealism. What you add through your prompt is everything the elevation can't convey: materials, environmental context, lighting, and atmosphere.
This is the workflow that converts a 30-second sketch or a clean CAD elevation into the kind of exterior visualization that used to cost $1,500 to $3,000 from a 3D rendering studio — at a fraction of the cost and in a fraction of the time.
Choosing Your Input: CAD Elevations, Sketches, and Massing Models
Not all elevation inputs produce equal results. Here's how the three most common input types differ and how to prepare each one.
CAD / Vector Elevations
These are the strongest inputs for AI exterior rendering. CAD elevations are orthographic, geometrically precise, and clearly show every window, door, opening, and building plane. The AI reads them with high accuracy and produces proportionally correct results.
Best practice: Export at 2x or 3x the target output resolution — minimum 2,000px wide for a standard output. Use a white background with black or dark gray linework. Avoid colored fills, hatching patterns, or dimension lines that might confuse the AI's interpretation of the building face. If your elevation has text annotations, consider exporting a clean linework-only version.
Hand Sketches (Paper or Tablet)
Sketch-to-render mode is tuned for hand-drawn input, including perspective sketches and rough elevations. The AI is tolerant of imprecise linework and fills in detail where the sketch is ambiguous — for better or worse, depending on how specific your prompt is.
Best practice: Scan or photograph at high resolution (2,400px minimum). Correct for lens distortion if shooting with a phone. Use a clean white background — a photo of a sketch on a yellow legal pad will produce weaker results than a scanned sketch on white paper. If your sketch includes material hatching (brick patterns, wood grain lines), it helps, but the prompt carries the primary material specification.
3D Massing Screenshots (SketchUp, Rhino, Revit)
A screenshot of a rough massing model — even an untextured solid-color view — is an excellent input for complex 3D geometry. The AI can work from the three-dimensional form even without any material information, and the perspective view gives it a naturalistic camera angle that an orthographic elevation can't provide.
Best practice: Use a perspective view close to the camera angle you want in the final render. Export against a white or neutral-gray background. Avoid face-specific colors that indicate material zones if you want the AI to interpret materials from the prompt alone — or use them intentionally if you want the AI to use the zones as guidance.
Crafting the Exterior Rendering Prompt
The prompt for an exterior render from an elevation needs to do three things that interior render prompts don't always require: define the building's environmental context, specify materials with precision, and describe the sky and atmosphere. A prompt that skips any of these produces a render that looks incomplete.
Five-Element Framework for Exterior Prompts
- Building description: architectural style, material palette, key design features (overhangs, mullion pattern, cornice detail)
- Environmental context: site type — urban street, suburban residential lot, rural hillside, waterfront, commercial district
- Camera and viewing angle: street-level, eye-level, slight elevation, 45° corner view, aerial oblique
- Lighting and time of day: bright midday sun, overcast diffuse, golden hour, blue hour twilight, morning side light
- Atmosphere and season: spring foliage, summer full canopy, autumn color, winter bare trees, dry summer grass
Prompt Examples by Building Type
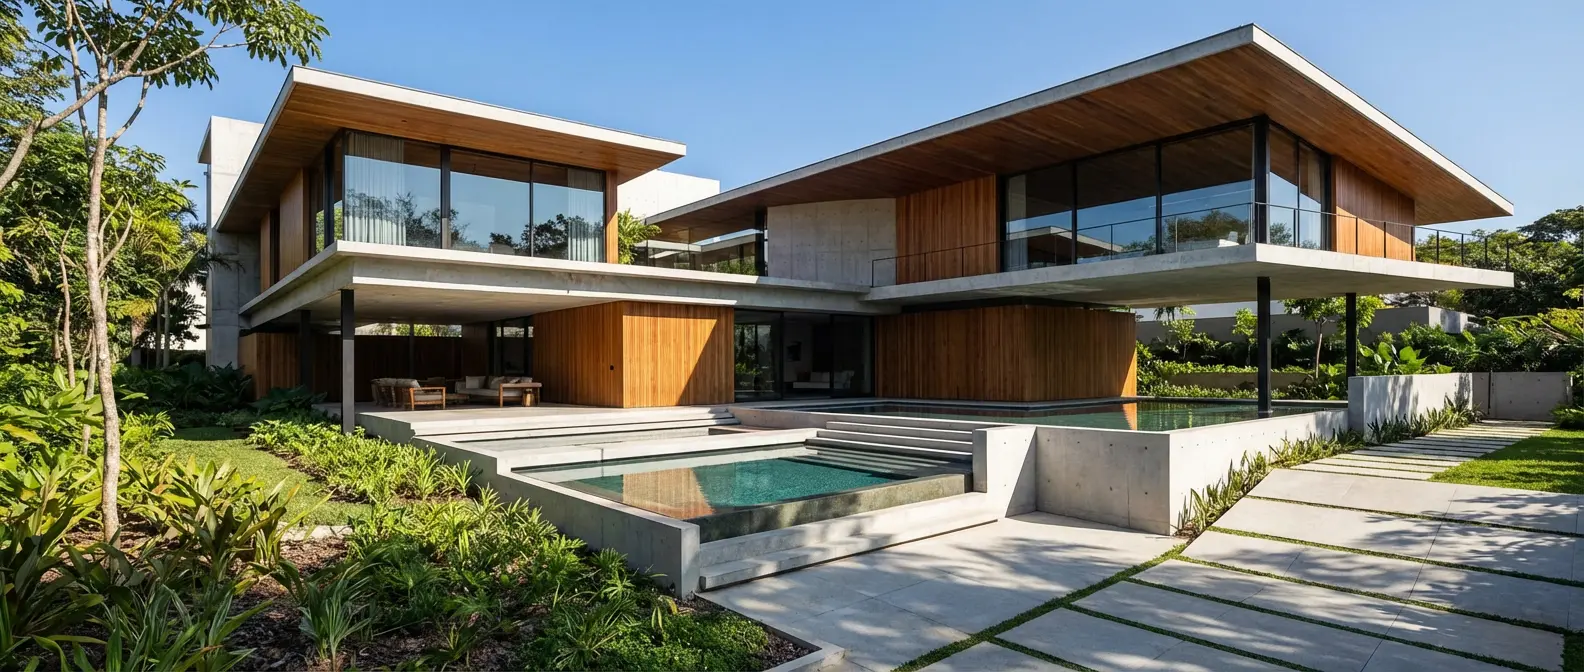
Modern Residential Exterior — CAD Elevation
"Contemporary two-story residence, vertical cedar board-and-batten siding painted charcoal grey, black-framed floor-to-ceiling windows, standing seam metal roof, flat overhang over entry, suburban residential street context with concrete sidewalk and mature deciduous trees, photorealistic afternoon sun from upper right, sharp material shadows emphasizing vertical board profile, blue sky with scattered clouds, warm and refined"
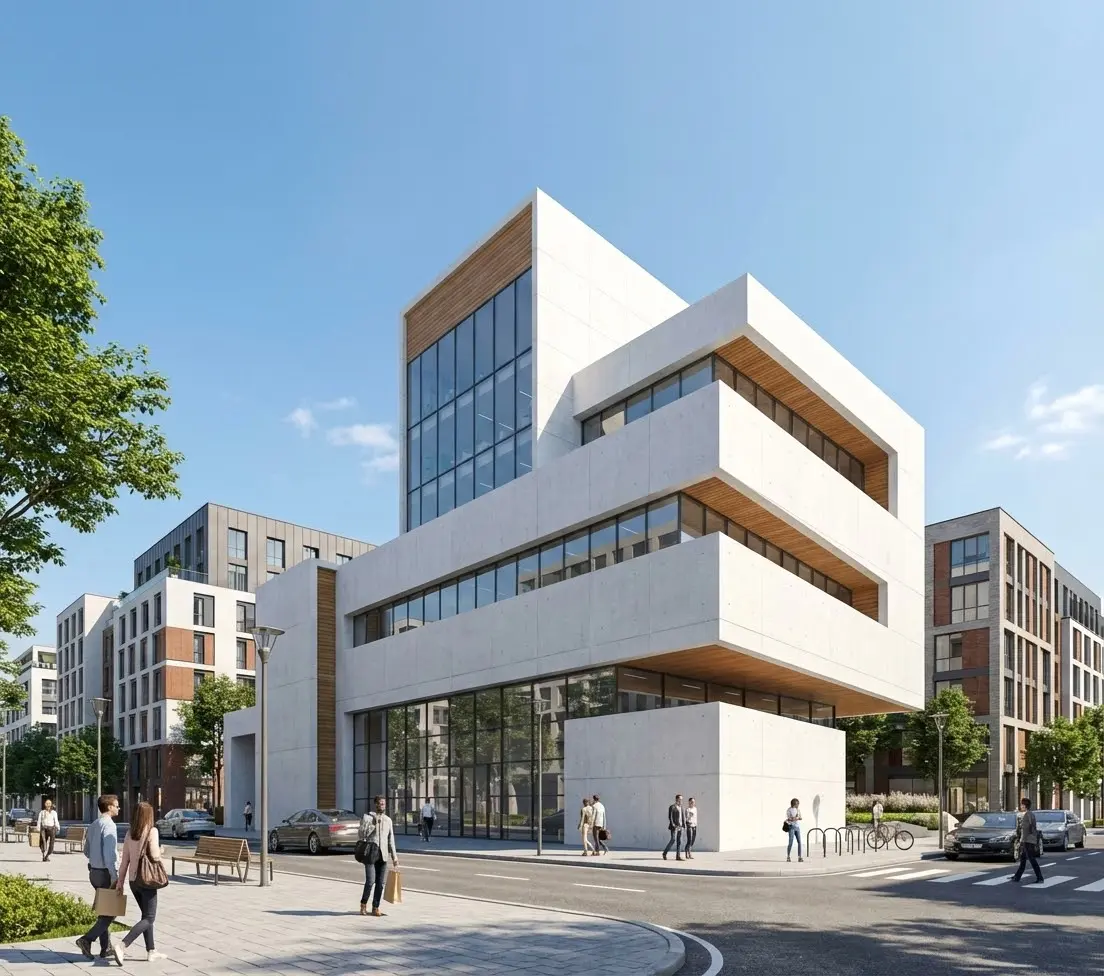
Mixed-Use Commercial Facade — CAD Elevation
"Three-story mixed-use building, ground-floor retail with large glass storefront and canopy, upper floors in red brick with punched aluminum-framed windows, cast concrete cornice and sill details, urban street context with sidewalk and parked cars in foreground, adjacent buildings visible at sides, midday overcast sky, city-block scale, photorealistic architectural exterior, contemporary and grounded"
Traditional Single-Family Home — Sketch Input
"Traditional two-story colonial home, white horizontal lap siding, black shutters, brick chimney, symmetrical facade with covered entry porch and columns, suburban street setting with mature oak trees in background, afternoon golden light from left, warm and welcoming, photorealistic exterior render, green lawn and hydrangea foundation planting in foreground, blue sky"
Multifamily Residential — Massing Screenshot
"Five-story multifamily residential building, concrete podium base with wood-panel upper floors, exterior balconies with cable rail, recessed entry at grade, urban infill site with adjacent buildings visible at both edges, overcast diffuse northern light, contemporary and understated, photorealistic architectural exterior, pedestrians on sidewalk for scale"
For a deeper framework covering prompt structure for all render types, see our complete guide to AI rendering prompts.
Material Specification: The Most Important Part of the Exterior Prompt
Materials are the most important thing you control through your prompt in exterior rendering — the AI has no way to infer your material intent from a line drawing alone. Without a specific material description, cladding defaults to generic gray, windows become dark holes, and concrete becomes something closer to painted drywall. Here's how to get precise material results.
The Material Specification Formula
For each major surface, describe: material name + color/finish + texture detail. The more specific, the more accurate the output.
| Surface | Weak Prompt | Strong Prompt |
|---|---|---|
| Exterior cladding | "wood siding" | "vertical cedar board-and-batten, natural finish, grey-brown weathered tone" |
| Masonry | "brick" | "modular red brick with raked mortar joints, iron-spot finish" |
| Concrete | "concrete" | "board-formed architectural concrete, fine vertical grain texture, medium grey" |
| Glazing | "windows" | "floor-to-ceiling low-iron glass, slight grey-green tint, warm interior lighting visible through glazing" |
| Roofing | "metal roof" | "standing seam Corten steel, oxidized orange-brown patina, 1.5 inch seam spacing" |
| Stucco | "white stucco" | "smooth integral-color stucco, off-white (NCS 0500-N), hard sand finish" |
Specifying color using industry-standard references — paint names, NCS codes, or Pantone references — produces more consistent color matching across multiple renders of the same building. This matters when you're producing a set of four elevations and need the cladding color to read as consistent across all views.
Context and Landscape: Making Exterior Renders Feel Grounded
The biggest differentiator between a competent exterior render and a compelling one is environmental context. A building floating against a plain white sky reads like a diagram. A building set on a real street, with a sidewalk, trees, parked cars, and a believable sky, reads like a photograph.
Three Layers of Context to Specify
Foreground: What's in front of the building — sidewalk material (concrete, brick pavers, exposed aggregate), planting (lawn edge, low groundcover, foundation shrubs), and any site elements (parked car at scale, pedestrians, bicycle rack). The foreground anchors the building's scale and grounds it in a real site.
Mid-ground: This is where the building sits. Describe the immediate site: "on a corner lot with a 20-foot setback," "ground-floor retail with covered outdoor seating," "residential courtyard visible between wings."
Background: What's behind and beside the building — "adjacent buildings on both sides" for urban sites, "mature canopy trees" for suburban, "open sky with distant ridgeline" for rural. The background contextualizes the project typologically and helps the AI set the right scale.
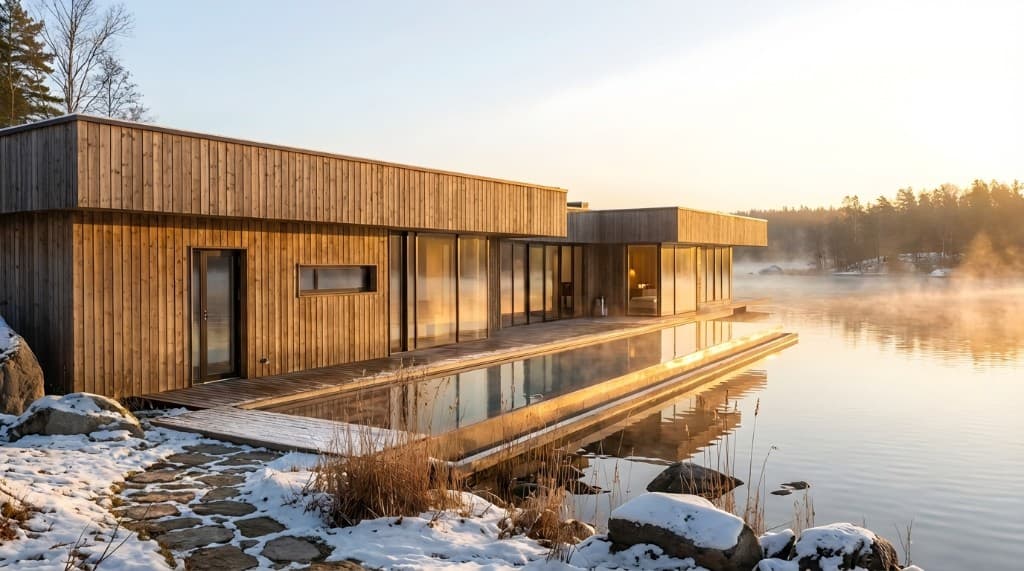
Season and Vegetation
Deciduous trees in spring (light green fresh foliage), summer (full dense canopy), autumn (golden-orange), or winter (bare branches) each produce a distinctly different character for the same building. Specify which you want — the AI defaults to summer green if unspecified, which is usually fine but not always right.
AI Exterior Rendering vs. Traditional 3D: When to Use Each
| Factor | AI Exterior Rendering | Traditional 3D (Outsourced) |
|---|---|---|
| Turnaround time | 1–5 minutes per image | 2–5 business days per image |
| Cost per image | Cents to a few dollars (credits) | $500–$2,000 per image |
| Input required | Elevation, sketch, or massing screenshot | Full 3D model (provided or built by artist) |
| Iteration speed | Near-instant — re-render in seconds | Hours to days per revision |
| Material control | Via prompt language | Via textures applied to 3D model |
| Cross-view consistency | Good with consistent prompt language | Excellent — model-based |
| Early design phase | Ideal — fast, cheap iteration | Too costly for early-phase exploration |
| Final marketing use | Yes — for most projects | Yes — maximum pixel-level control |
For early-phase design exploration, client design reviews, zoning board submissions, and presentations where you need fast, affordable visualization, AI exterior rendering is the clear choice. For flagship projects where final marketing materials need pixel-perfect material accuracy across dozens of controlled views, traditional 3D remains viable — but for most work, AI output is sufficient and the speed advantage is decisive.
Producing a Multi-View Exterior Set
A single exterior render is good. A coherent set of views — front, rear, corner, and detail — is significantly more persuasive. Here's how to build one efficiently.
- Start with the hero view. This is usually the main facade or a 45° corner view that shows two faces of the building simultaneously. Get the materials, lighting, and context right here first — it establishes your visual standard for the set.
- Write down your core prompt language. Once you have a prompt that produces strong results for the hero view, capture the key material descriptors, lighting setup, and context description in a text document. You'll carry these forward to every subsequent elevation so the set reads consistently.
- Apply the same prompt language to each elevation. Change the camera angle descriptor ("front facade, street-level view" → "rear facade, garden level view") but keep the material and lighting language identical. This is what makes the set read as one coherent building rather than four loosely related images.
- Add a detail render. A close-up of the entry canopy, a material detail panel (showing how the cladding meets the window frame), or a section perspective showing interior-exterior relationship adds depth to the set and demonstrates design resolution.
- Vary the lighting only if it serves the presentation. A twilight or golden hour render of the same building can be added to the set as a supplementary image — it shows the design in a different light and adds visual contrast. Keep at least two images in the same daytime lighting for material legibility.
For twilight and dusk rendering techniques, see our guide on AI twilight rendering.
Common Exterior Rendering Mistakes — and How to Fix Them
The building floats in a white void
An elevation drawing has no ground plane. If you don't specify ground context, the AI places the building in a neutral void that reads as a diagram, not a render. Fix: always include a ground description — "concrete sidewalk in foreground," "gravel forecourt," or "green lawn with foundation planting."
Windows render as dark opaque holes
With no photo input to provide interior detail, glazing often renders as flat black or dark gray. Fix: add "warm interior lighting visible through glazing," "visible interior space behind glass," or "reflective glass with sky and trees reflected" to your prompt — whichever matches the time of day.
Materials default to generic gray
Without specific material instructions, cladding defaults to something between painted stucco and bare concrete. Fix: use the material specification formula — material name + color/finish + texture detail — for every major surface in the building.
The sky is flat and uninspiring
A plain solid-blue sky backdrop makes even a well-designed building look like a diagram. Fix: add sky texture — "scattered cumulus clouds," "high thin overcast with soft diffuse light," or "dramatic storm clouds backlit at horizon" — to give the sky visual interest that frames rather than flattens the building.
Scale reads wrong
With no human figures or site elements in the foreground, scale cues are absent and the building can feel like a model or a toy. Fix: add scale references in the prompt — "parked car at street level," "pedestrian near entry," "bicycle rack at building base" — to anchor the scale.
Multiple renders look inconsistent
If the prompt changes significantly between renders of the same building, the materials and lighting will drift between views, making it obvious they weren't from the same model. Fix: save your core material and lighting prompt language and copy-paste it into every new render of the same project, changing only the camera angle descriptor.
Frequently Asked Questions
Can I render an exterior from just a floor plan, with no elevation?
Not directly — a floor plan is a horizontal section, and AI rendering works from elevation or perspective inputs that show the building's vertical face. If you only have a floor plan, your options are: generate a rough elevation in CAD from the plan, build a quick SketchUp massing model and screenshot it, or describe the exterior verbally in a prompt-only generation (though proportional accuracy will be lower without a drawing input). For most projects, even a five-minute SketchUp massing sketch produces a far better input than trying to render from a plan.
What resolution should I export my CAD elevation before uploading?
Minimum 1,200px on the short side; 2,000–3,000px is better. The output resolution of your AI render is bounded by the input resolution — a larger input gives you a higher-resolution output. For print-ready work, export your elevation at 300 DPI at the intended print size before uploading. For web or presentation use, 1,920px wide is usually sufficient.
How do I produce consistent material rendering across four elevations of the same building?
Keep the material and lighting language in your prompt identical across all four views, changing only the camera angle. Save the core prompt as a reusable template for the project. Color consistency is particularly important — if your cedar siding prompt says "grey-brown weathered tone" on one render and "warm natural wood" on another, the outputs will diverge noticeably. Precision in the material description is what holds the set together.
Can I use AI exterior renders in planning or zoning board submissions?
Yes — AI-generated exterior renders are used in planning, zoning, and HOA submissions routinely. The key is disclosure: most jurisdictions and boards require renderings to be labeled as "computer visualization," "AI render," or "design concept — not a photograph." Check the specific submission requirements for your jurisdiction. AI renders tend to be more persuasive than CAD elevations or hand sketches for non-technical audiences, which is their main value in approval processes.
How does pricing work for exterior rendering?
Rendershop uses a credit system — each render consumes credits based on the rendering mode and output resolution, not on complexity of the input or the prompt. An exterior render from a CAD elevation costs the same as a daytime interior render at the same resolution. See Rendershop pricing for current credit rates and plan options.
The Bottom Line
Exterior AI rendering from elevations is one of the most practical workflow improvements available to architects, designers, and builders right now. The inputs you already have — CAD elevations, hand sketches, rough massing models — are exactly what the AI needs. What you add through your prompt is the context, materials, and atmosphere that make those drawings feel like real buildings in real places.
The workflow is fast enough to use during design development, not just at final presentation. Run a render while the client meeting is still happening. Show three material options side by side in the time it used to take to open a rendering program. Use the fast iteration to converge on a design direction in an afternoon rather than across a week of back-and-forth with a 3D artist.
Start with a clean, high-resolution elevation export. Describe every major material using the name-color-texture formula. Ground the building in a specific site context. Specify your lighting. The first render tells you what to refine — the second usually hits.
Turn Your Elevations into Photoreal Renders
Upload a CAD elevation, hand sketch, or massing screenshot and get a photorealistic exterior render in minutes. Try Rendershop free — no credit card required.
— The Rendershop Team